Showing posts with label pins I love. Show all posts
Tuesday, 2 August 2016
Pins I Love - Sashiko
I have promised a post on Sashiko for so long now that I bet most of you have forgotten. I haven't and it's been niggling away that I haven't done it yet. I also haven't finished my own Sashiko project as it's sitting collecting dust at my dads. My flat has all come together and I have most of my furniture, including a desk. I am hoping that by the end of August I will have packed everything and have it here with me (if not unpacked).
In the meantime I thought I would share with you some tutorials I have come across. Maybe it will encourage you to give it a go or maybe it will give you inspiration. Maybe both. As always with my Pins I Love posts none of the images are mine (although in this case the rubbish one at the top is mine) and you can click on the images to take you directly to the source. Have fun!
The first tutorial I picked because it came from one of my favourite websites and it was one of the first tutorials I came across. I love Purl Bee. It has lots of gorgeous patterns. Some of which are free. I mainly like it for it's knitting patterns. I always think they look so fresh. It shouldn't surprise me that there should be a tutorial on Sashiko since the website also covers stitching but it did. Pleasantly I should say. I should also stop calling them Purl Bee since they changed the name a few years back to Purl Soho (my bad). They even have pattern on offer but be warned it will be posted out to you from the States so might be pricey.
The second tutorial is a good one too. I like it for the fact that it shows you that Sashiko can be used to decorate just about anything. In this case the edging of some curtains. This is particularly good if you want to jazz up some boring curtains. My own curtains are too heavy for this to work (night shift needs heavy curtains) but if you have something light weight it would be perfect. This comes from Stitch Craft Create magazine. They don't seem to be publishing anymore but their old blog posts and tutorials are still there for the moment.
I love this one for a couple of reasons. First of all the stitches are in red. Secondly they are so tiny and precise. Thirdly it's a video from instagram by liubov21.03.76_. She has a youtube channel too but it's not in English. However, you can follow her link to it from her instagram page if you are interested. Now this isn't a full tutorial. It's a short video of the creator crafting some stitches. It does give you an idea of what's involved though and it's mesmerising to watch.
This last tutorial is by Sake Puppets. It follow the traditional route of white embroidery thread on dark blue. Traditionally Japanese used the white threads to reinforce their kimono's and decorative patterns then ensued. Interestingly the person who wrote this tutorial moved to Tokyo and started a blog on the crafts she learned (along with her husband) there. Sashiko is one of them and she now has an etsy shop with her patterns.
I hope you like the tutorials and if it inspires you to do some yourself I would love to see it. Incidentally, I have saved all of these links to my craft tutorials page under sewing.
Labels:
embroider,
embroidery,
pins I love,
pinterest,
Sashiko,
tutorials
Friday, 12 February 2016
Pins I Love - More Socks
Since this week has been all about socks I thought I would keep the theme going. I realise that we have already had a socks themed pinterest post. But that was a little over two years ago and I am always looking out for new sock patterns via pinterest.
This first pattern is probably the simplest of the five but it's one of my favourites. I had replied to a comment earlier saying that I wasn't sure what I would do for March but this might be it. look how effective it is with the striping of the yarn. This doesn't actually come with a pattern but is a series of notes. There is no instructions for the heel or toe but you could use your favourite way of doing either or a way that you think would best compliment the sock. The notes are by Hanna Levaniemi and can be found on ravelry for free (just click on the image). She has decided to use a different yarn entirely for the cuffs, heels and toes.
Another free pattern on ravelry but slightly more complicated. This one is by Natalia Vasilieva and is called Semki. I have this pattern in my library but haven't looked at it properly yet. Might have to leave this one until I have more time on my hands. I do love the look of it though. It's almost like little owls and would be perfect for a solid yarn. I also like the fact that the pattern travels all the way down to the tips of the toes.
Of course I was always going to have a pattern with a cable in there. Can't get much cabley than this pair by Patons. Again this is available for free on ravelry. I find it hard to believe that this yarn is knitted in 4ply only. The cables make it look a lot thicker. I think I will have to add this to my to do list. Another sock that would be better in a solid yarn. To be honest, I quite like it in the white.
This pattern and the next one are not for free. I think though you can see why the designer would expect to be paid for the pattern. Look how complex this is. It puts me in mind of sock designer Cookie A. This pair is called Summer Sliding and is by Jeannie Cartmel. She actually has a few lovely patterns to her name which I am going to investigate later. I love the lime green of the yarn she used. The striping of the yarn is very subtle so it still shows off both the yarn and the pattern. Definitely one for the expert knitter I think.
Last but not least is a pair of lovely socks done in colourwork. I picked this pair because I recently came across it and it's kind of fitting since it's Valentines Day on Sunday (I will be celebrating with a 12 hour shift). Actually, my mum would have loved these. They are called ElinPelin socks and are by JennyPenny also on ravelry. She appears to be a talented designer as she has quite a lot of colour work patterns on there. Definitely worth going to have a look.
If you knit any of these let me know. I would love to see them. Love a knitted sock!
Labels:
pins I love,
pinterest,
ravelry,
Sock Knitting,
socks
Friday, 5 February 2016
Pins I Love - Adult Colouring
I actually don't like the term 'adult colouring' sounds a bit suggestive and I would almost be too wary of typing it in to google for fear of what might come up. Or does that say more about my mind? Regardless I still love it and you don't have to buy these large books if you don't want to. I thought I would scour my adult colouring board on pinterest to see if there was anything I could link here. I have to admit that there were a few missing links which was a shame but I think I found a nice selection and failing that there is nothing to stop you from having a wee search to see if there is something that suits your taste more.
This first one is an ebook on offer from Dawn Nicole Designs. Yes, you have to pay for it but you are helping to support an indie designer and I'm all for sending out support to indies. When looking at the blog it is clear that the author likes to craft in general. I like the feel of her blog. It's light and airy. Definitely go have a look.
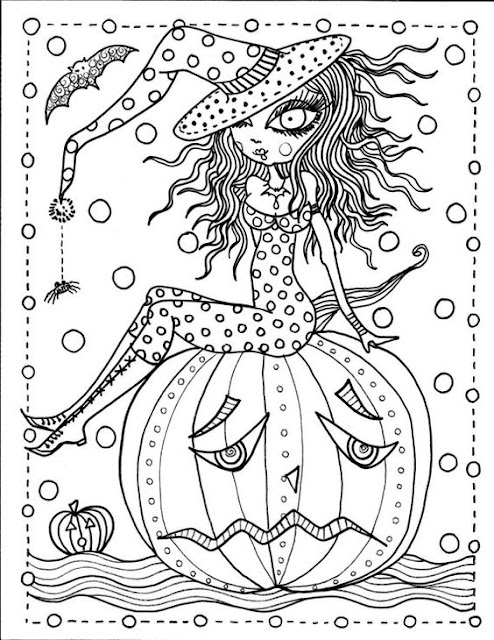
I love this one. It's quite cute. This is part of a Halloween colouring book by Chubby Mermaid (LOVE the name) and can be found on etsy. The designer has a whole series of rather sweet colouring books that you can download (for a charge). She even has some individual pages that you can purchase for downloading so you don't even have to buy a whole book.
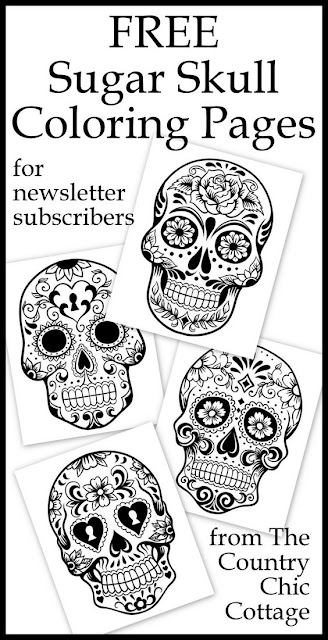
Sugar skulls are another fad that's around just now, although maybe that one is starting to cool down. I still like them and it helps that I have a skull loving sister (who loved them before there was a fad). These skulls are a free download from The Country Chic Cottage and they have a whole host of free colouring pages. The skulls though are my favourite. The blog is more of a lifestyle type blog. I've added it to the mixed craft blog list as there are a few things in there that might appeal to different people.
This last one is another along the sugar skulls line. Like the last set of pages this is free and comes from a website filled with lots of different pages. It's actually a resource website for kids filled with educational pages as well as colouring. Still, there might bee something there for everyone.
This last one is from Johanna Basford's Enchanted Forest book. I decided to post this image to show just how creative people can be with their colouring. On Tuesday I linked to her webpage. She has a whole gallery filled with examples of her pages coloured. Definitely go have a look as some of them are so pretty and may inspire.
The important thing though is that you have fun with it. After all colouring is meant to be relaxing.
Friday, 29 January 2016
Pins I Love - Stash Busting
I think this stash busting post will be slightly more exciting than my last one as it isn't reliant on my own stash busting experiences. Instead I have looked through pinterest (and even created a stash busting board) to pick out some interesting methods of using up your scraps.
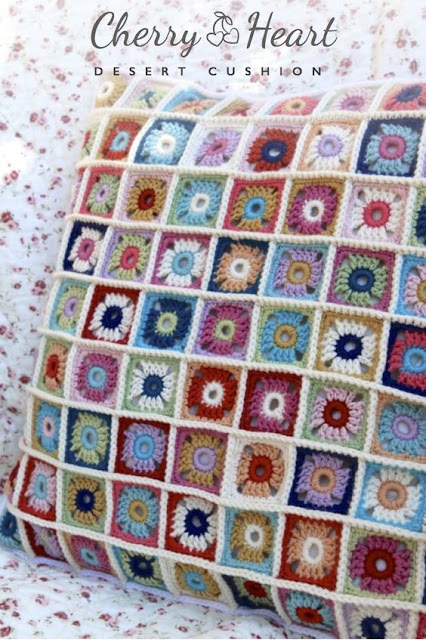
This first one is a cushion made by Cherry Heart. She used a small square motif and then a single crochet stitch to join them together. The effect is rather pretty. The link to her cushion is attached to the image (as with all my pinterest posts just click on the images). I'm afraid it doesn't lead to a tutorial on how to make it. However, the squares were actually a tutorial by one of my favourite bloggers, Attic 24. That's not to say Cherry Heart isn't worth a visit. She loves yarn and is a sock knitter too. There are even some patterns on her blog. On top of that she also posts podcasts, something I have been meaning to get into. I've mentioned her blog before so you will find it on my blog list page already. You can find the tutorial for the squares here.
This next one is actually a free download found on craftsy. If like me you have lots of leftover sock yarn then this is perfect. Especially if you are a knitter and don't want to use your scraps for crochet. The downside to this is that you would have lots of ends to sew in but the tip there is to sew as you go. It also doesn't have to be a blanket, it can be a scarf or a cushion. It's up to you. I have actually seen this finished via instagram and while I wasn't keen on the work in progress it looked stunning once finished. As I mentioned this is a free download from craftsy. Craftsy is a website I have mentioned many times. It's for all sorts of crafts and it's a website that I have barely utilised but probably should.
This is the last example involving yarn and of course I was always going to have a pair of socks on this list somewhere. These socks are stunning. They are by Jenny F and she has called them 'Music to my Eyes'. Easy to see why she would give it that title. These are stunning and a perfect way to use up all those leftover sock yarns. Sadly, there is again no tutorial. The maker of these socks actually adapted a pattern from a pair of mitts. It would take a talented sock knitter to do that. If you think you could do it though just click on the image and Jenny F will send you to the mitts pattern. The downside to this is all the ends to sew in. Not sure I would have the perseverance to do that. If you fancy something more simpler though you could easily adapt your basic sock pattern. Such as using large stripes (less ends) or using your scraps for the heels and toes.
This is another free download from Craftsy (at least it's free at the moment. It is filled with ideas on how you can use up your fabric scraps to create cushions, mug rugs, quilt blocks and table runners. I haven't had the chance to look through it properly but I would recommend downloading it. It will only take up some of your memory space and it might give you a few ideas to play around with.
This is probably one of my favourites. This tutorial is for floor pillows and it is made entirely from scraps. A really good idea if you have a lot of them. This is from Sew Mam Sew and they recommend sorting your scraps into colour. You bring shades of the same colour together to make these fab floor pillows. And, as I said, there is a tutorial to show you exactly how to do that. I am not sure if I have linked to Sew Mama Sew before or not but I do recognise it as being a place I have visited before. It looks more like a brand rather than ran by say someone like myself. However, I think it should be in every stitcher or quilters bookmark as it has a lot of tutorials on there.
I hope this has given you some ideas although there are a lot more out there. If you have some of your own I would love to see them.
Friday, 22 January 2016
Pins I Love - Getting Organised
I thought it would be apt to have this pins I love post following on from Wednesdays.
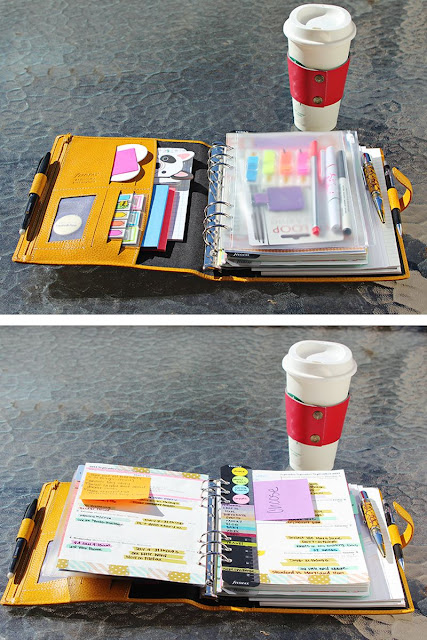
Believe it or not people love to share their organiser and planners. A lot of creative types use it as just another creative outlet. I love seeing them on pinterest and have a board dedicated to filofaxes (although I pin anything planner related in there). Scattered Fashionista shared her Erin Condren planner. It would seem that Erin Condren is a US stationary designer famous for her planners. Why I am sharing this one though is that I think it highlights how you can use washi tape and post-its to be both useful and decorative (I love washi tape and post-its). I haven't linked this blog to my list because it's more of a lifestyle blog than a craft blog. However, you can link on the above image and it will take you to it.
This one is one of my favourites. Viv's of Oh Shoot writes in detail how she uses her filo fax. She has lots of useful ideas in there based on what works for her. The images here are so pretty! While I like her post and I love the look of her filofax it's a little too big for me. I would want to carry this about everywhere and I already carry far to much in my bags. Sadly this blogger has disappeared from both her blog and twitter so no link.
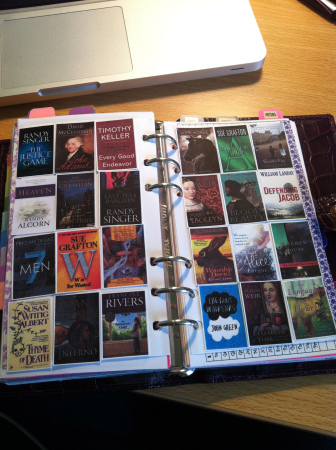
As we all know I am a book fiend. I LOVE this idea although it involves a lot of work. Incarnations of Organization is a blog about planning. Sadly it hasn't updated in a year but the author was very creative with her filofax. A fellow lover of washi tape. However, it was the above image that caught my attention. She uses her planner to keep a list of books that she wants to read and books for her book club. She came up with the idea of putting images of the book cover in there. These are little stickers which she has printed out and can be moved from 'to read' to 'read'. I love this but like I said it's a lot of work. A lot of time spent in front of the computer manipulating images. I would lose patience with it very quickly.
Bullet journals have become increasingly popular. I've noticed that just by my feed on pinterest. This is just a form of list making. It originated by Ryder Carrol. It's supposed to be that by using bullet points in a more creative manner you will become more organised. It's fairly easy to follow and saves on lots of post-its all over the place. As much as I love a list and often use checklists. I just put them on post-its and stick them in my planner. Not sure I would want to dedicate a diary or journal to it. Might be interesting to see if it works though.
This last one isn't in English I'm afraid. It's a tutorial by Lucy Wonderland. It shows you how to make pockets for your organiser/filofax. Normally I wouldn't link a blog which isn't in English, or doesn't have some form of translate. The images in this tutorial though are kind of self-explanatory. I also thought it would be nice to have something that you can actually craft in the hopes that it would make it a little more interesting (for those of you who aren't stationary geeks like me).
Labels:
FiloFax,
Getting Organised 2016,
January 2016,
paper craft,
pins I love,
pinterest,
planner
Friday, 15 January 2016
Pins I Love - Organising Your Crafts
Last week I posted images to some lovely craft spaces with links to the owners of those spaces (or to their blogs at least) in the hopes that it would inspire. This week I looked through my craft room board on pinterest and came across some tutorials and ideas on how you can have a similar space. As with last week none of these images are mine. However, to get to the owners page just click on the images.
This first one is one of my favourites and probably one of the most complex. Ginger Snap Crafts shows you how to create this pin board which would look fab on the wall of any craft room. I have to be honest that I think this is probably beyond me but I still love it. As for Ginger Snap Crafts it's a fantastic blog with lots of fun craft tutorials including baking and stuff for kids.
This isn't really a tutorial. It doesn't take rocket science to get an empty jar and place your craft supplies in it. However, it is a good idea. I have seen jars decorated with crochet covers or painted with glass paints. So you can put more effort into it. I did it the lazy way and have some pretty coffee jars. The above image is from How to Nest for Less. The author is posting about her craft room so worth heading over to have a look. The website itself is more of a home decorating online magazine. While I won't be linking the page to my blog listing you can head over here.
This is another favourite and one that I can see myself doing. Fill a jar with buttons and then make a pin cushion for the top of the jar. This tutorial is by the Seasoned Homemaker and is actually easy to follow. I personally don't think it's just a good idea to keep together some of your craft supplies. It would also make a great gift. I have seen similar elsewhere which also fills the jar with spools of thread rather than buttons. If you head over to the Seasoned Homemaker you will find lots of tutorials and ideas for stitchers and bakers.
I love this way of organising washi tape. My washi tapes are crammed into a tin which I have to rummage through when I'm picking one out. This was done by Crafting in the Rain. As much as I love it, it does take up a lot of space. I think you would have to use your tape on a daily basis to warrant this. Crafting in the Rain is fun blog. The author mainly posts about paper crafts but she has some DIY and cooking ideas in there too.
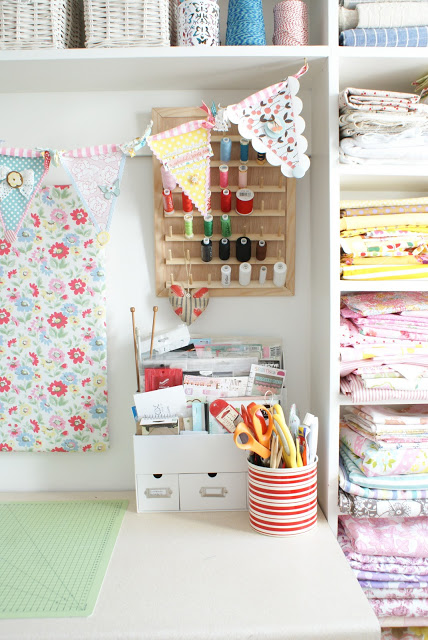
Lastly, this one isn't so much a tutorial. This is a link to someone else showing off their craft space. In this case a sewing room. Definitely head over and have a look as it's a lovely room. The reason I have used this image is that I love the idea of fabric scraps being collected like this. I know a lot of people who would probably just through out their scraps but it's amazing what you can make out of them. I have seen people using the tiniest scraps to make mini patchwork. That's just one way to use it. Maple and Magnolia is another blog dedicated to DIY and decorating.
This is an extra addition. I added this because it gives some tips on how to declutter your craft area. There are some common sense and good ideas in there. It may be especially handy if you are a hoarder like me. It might also be difficult. It encourages you to get rid of the things that you don't use. Sound advice though. This comes from blog Simple As That. The author of the blog has a few tips for organising but she's also a crafter.
As always I have linked most of these on my tutorial page and craft blog page. You may not want to try any of theses tutorials but maybe you will find a new blog to follow.
There are lots of ideas out there. For example organising your fabrics by colour onto shelving to make it easier to see. I have seen yarn organised the same way (much as you would see it in a yarn store). I have also seen baskets placed onto shelves and craft supplies kept within those and cutlery trays within drawers separating supplies. I imagine there are even more than that. If you have any of your own I would love to hear about it. Oh, and remember, if you would like to post a little bit about your own craft space I would love to do that here.
Friday, 8 January 2016
Pins I Love - Craft Rooms
I thought I would bring back my Pins I Love posts, at least just for my getting organised theme. I am still as pinterest obsessed as ever and I love to share what inspires me. I have a whole board for craft rooms. I would love to have one of my own and maybe one day I will. For now I just need to look at others for inspiration. As with all of these posts none of the images are mine. Just click on the images and it well take you to the pages they belong to.
Beneath My Heart is a website about crafting your home (a theme that I plan myself for later). What I like about this post is that it shows people how to turn a closet (cupboard to us UK folks) into a mini craft space. Perfect for people like myself who have limited space in the first place. It's a cute little space and the key is organisation. Oh, and it's in my favourite colour. I've also saved this on my craft tutorial page if you are looking for it later.
This next space is by blogger and quilter Messy Jesse. It's not a tutorial. The author of the blog has reorganised her craft space and is posting some images of what it looks like. It might not tell you exactly how to create your own craft space. What it can do though is inspire you or even give you some organisation ideas. Plus the images are pretty. On top of that it's another quilt blogger to follow and she even has some quilting tutorials to follow.
This next craft space is by Serena of Farm Chicks. This was done and showed for a magazine. The images aren't by the author. Nevertheless it's still a cute space. Definitely another space for the stitcher. However, I think you could adapt it to suit. This post again doesn't really show you how to create your craft space. It does give some tips on everyday things you can decorate and then use to organise your space. Farm Chicks itself is more like a homes online magazine. It has lots of things of interest, including quilting.
Another craft room which is a tiny bit too cutesy for me. It has aspects of it which I like and it is more rounded to be able to include crafts other than sewing. This one can be found on Design Dazzle which is very much a page for home decor. It doesn't tell you how to put together the whole room but it does have ideas on how to put together different aspects of the room such as the framed chalk board.
This last one doesn't actually belong to the author of the blog post. The blog is called Budget Decorator and well, it's about decor. Like me the author has brought together images of various rooms that they have found inspiring. Unlike me she has given her own tips on how to organise your craft space or create your own craft room. Very much worth a read.
I hope you enjoy and I hope this has given you some inspiration if you are planning your own space. I have a few guest blogs coming up from friends who will show you their own craft space. I'm very much looking forward to those. Plus, I have space for more guest bloggers. You can show how you organise your space or focus on one aspect of it or even post a tutorial. It's up to you and you can use that opportunity to promote your business or your won blog. I would even be happy to reciprocate. Just leave me a message here or on my facebook page.
Monday, 27 April 2015
Pins I Love - Try Something New For Spring!
I honestly don't see why trying something new should be something you do in the new year. Let's face it. New Year is slap bang in the middle of winter. It's miserable and most of us are still reeling from the financial cost of Christmas. So what better time to try new things than spring. Spring is the proper time for the new. Everything is fresh. For most it brings us that spring in our steps that has been missing in the winter. Therefore I bring back my pinterest posts with some new things to try.
The first are these geeky cookies. I am hopeless at decorating of any kind although good at the baking part. I think even I could manage these though. There is a fab tutorial over at a fab baking blog, When Adobo Met Feijoada. You will need google translate though.
As always click on the image to get to the precise tutorial.
Okay, I tried to find a simple sewing pattern suitable for a beginner but struggled. As someone who has yet to pluck up the courage to sew much it all looks difficult to me. This tunic though looked quite nice and it has a good tutorial over at The Southern Institute. It shows you this tunic being made up in some lovely bright fabric. It's amazing how much a pattern can change just from the fabric.
I have taken part in tutorials and taught a few myself. What keeps people interested is the idea that they will have made something by the end of it. These mini granny squares are fantastic for anyone wanting to learn to crochet them. Plus you get a cute pocket for your ipad or ereader at the end of it. You will find this tutorial at Sugar Beans. Worth checking this blog out as it seams to have a lot of lovely tutorials.
I picked this lovely shawl for anyone wanting to move on with their knitting. It's a simple lace pattern and the shawl itself is lovely. You could even mix it up and add some stripes of colour in there. This one comes from ravelry.
It seemed only apt given my numerous gardening posts that I should have a gardening tutorial on this list. I picked this one because not everyone has a large garden or has direct sunlight. This website gives a tutorial into creating your own shade garden.
As I said earlier, clicking on to the images will take you direct to the tutorials. The few blogs that I have mentioned I will also add to my blog list.
Wednesday, 24 September 2014
Pins I Love - Crafts for the Bedroom.
It has been some time since I have done a pins I love post. Maybe because I have so many other things to actually show you. It's amazing what some time off does. I have started a few projects especially for my next flat and so thought it was about time that I posted this one which I had planned ages ago. I should point out that the title does give the impression that this may be an R rated post. Sorry to disappoint.
Just a reminder that if you want to find the project just click on the photograph. The first is hoop embroidery or hoop art. I prefer the embroidered versions but if you can't stitch you can still create something to hang on the wall. The above image links to a tutorial by Maggie Holmes Designs and she plots out how to make some hoop decorations just by using fabric. You could match this fabric to your bedding or to a pattern you have somewhere in you room. Or even just match it into your colour scheme. If you have some hoop embroidery you could mix it with some simple fabrics.
Or, if you like your wall decorations to be functional. Why not turn it into a wall clock. I quite like this. I actually plan to make a clock myself. However, it won't be going in my bedroom. Far too noisy for me. This was from a website called Brit.co. A lot of craft stores sell the clockwork parts.
What's a bedroom without a few cushions or pillows? I have made a few myself. Both in crochet and in cross stitch. However, I would love to make a quilted cushion. I love this one and it even comes with a tutorial which looks fairly simple and easy to follow. This is from a fab blog page called Crazy mom quilts. Worth checking out if you like all sorts of crafts. What I like about this simple design is that the use of different fabrics and colours could change the look of the cushion. I would love to see different takes on it.
I love candles and I do have then in my room. Don't worry I always remember to put them out before I sleep. I find them so relaxing and like to have one lit when I read. I also light them when I'm doing some tidying. I like to have a fresh lemon candle lit at those times (again keeping the candle away from where I'm tidying as I am clumsy). I also like a pretty candle holder. A friend of mine makes candles in vintage style teacups and I found a website that shows you how to make your own. How lovely would this look in your bedroom? Or even as a gift for a girly friend.
I left my favourite for last. As most of you will know I love a blanket. I have made a few in my time, mostly for other people. I am a blanketoholic. It's unusual to find a tutorial for a blanket. Especially one as intricate as this. Yet, it does exist. This is from a blog called Italian Dish Knits which seems to have a lot of lovely yarn projects. What I love about this one is how delicate it looks. However, you could change the colours to create a bolder blanket if that suits your taste. Like the cushion I would love to see how different people interpret it.
Monday, 4 August 2014
Pins I Love - Crafts for the Garden
Before I start, my absence was not planned. The truth is I have been mainly reading in between working on secret projects. The books are not crafty in nature and so I couldn't really talk about them here. I also took the huff with my last planned pinterest post (everything on there should have a decent link - new rule). All is now forgiven and this post is actually a spur of the moment choice.
To be honest my mum is the gardener of the family. Even when we had a flat my mum had plants everywhere. She is famous for never being bored of gardening shows. Her dream was always to have her own garden and now that she does it's very pretty. She takes great pride in it and every year she tries out new plants and colours. Me, I just admire. Doing this post made me think that maybe I am hitting middle age a little early. Then I remembered that my sister and I used to create our own garden designs using pens and paper. However, these are more crafty items for the garden rather than the gardening itself.
This first idea is actually quite a good way of cheaply brightening up the garden. Just paint some old terracotta pots to fit in with your garden. It's a good way of adding splashes of colour which won't detract from the flowers. Personally I would paint the post just one colour rather than adding stripes into the mix. The tutorial is by Sand and Sisal which seems to be a homes and garden online magazine. As always just click on the images to go straight to the tutorials.
There are a few of these vertical planters about pinterest. Some of which seem to defy gravity. This one seems fairly simple and I am sure many a gardener could do this no problem. This tutorial is by Sweet Bella Roos. A blog worth visiting if you also love your recipes. Back to the piled planters though. How fab would this look if you coordinate the colours on each level of the planter? I am thinking rainbows people!
This is another tutorial and a simple one at that. I honestly think I could do that. Again you could paint your pots to add splashes of colour to you garden. It's also a fantastic idea if space is a premium in your garden. You'll find this tutorial on a blog called Happiness Is.
A little different from you usual markers. Instead of just writing your herbs onto pieces of card paint a stone. This person has obviously went for the match the stone to the herb idea. Me, I would go for decorative as well as useful. Some bold colours with the herb name printed on them. You could even have them match the terracotta plant pots you have just painted. This tutorial is from a blog called garden therapy which seems to have a whole host of ideas and recipes.
Did you know that pallet gardens is a thing? Neither did I. To me pallets were always the nuisance things you deliveries arrived in on (back in the day when I worked with books). They made a mess of your floor, they wouldn't always fit in your pallet jack and you got rid of them as soon as you could. At least that was always my experience. There are umpteen images of pallet gardens floating around pinterest. Some of them are kept natural like this one and others are painted up (matching your other painted items maybe). I quite like the natural look and you could have a whole spray of colour at each level thanks to you plants. Most people it would seem use them for herbs and have each level labelled (but then where would your stones go). Anyway, this tutorial on Bright Nest gives step by step instructions on how to create your own.
I will be back later in the week. Not in two weeks, I promise. Baby shower number 2 is up this week which means I will be able to reveal another secret project.
Labels:
garden,
garden crafts,
gardening,
pins I love,
pinterest
Subscribe to:
Posts (Atom)